You can find support life cycle information at SAP support portal.
Go to https://websmp106.sap-ag.de/bosap-lifecycle then click "View End of Life Dates by Product" link, which is in the right side of the page under "Related Topics". Check BusinessObjects Enterprise in the list.
Error 1718. File was rejected by digital signature policy
When trying to install BOXI 3.1 or other BO version which have large Microsoft Windows Installer (.msi) package or a large Microsoft Windows Installer patch (.msp) package we get the error "Error 1718. File was rejected by digital signature policy"
CAUSE
This problem occurs if the Windows Installer process has insufficient contiguous virtual memory to verify that the .msi package or the .msp package is correctly signed.
RESOLUTION
Apply the fix for Windows Server 2003
Download the Update for Windows Server 2003 (KB925336) .
Reference
http://support.microsoft.com/kb/925336
Unable to connect to the repository. (DX0035)
In BusinessObjects Enterprise XI Release 2, when logging on to Desktop Intelligence, the following error message appears:
“Unable to connect to Repository. (DX0035)”.
This often affects only one or few enterprise accounts.
To resolve the error message, delete and create a new enterprise account for the specific user.
Please note that any recurring scheduled objects would then become owned by the administrator account. Reports in user folders, Personal Categories, and Inboxes are removed.
sessions and licenses are not released after the session timeout is reached
For Infoview, in addition to setting the timeout parameter, users need to uncomment the following line in web.xml to make a listener explicitly log off the session objects when they are invalidated:
'
'com.businessobjects.sdk.ceutils.SessionCleanupListener
'
For the CMC, users need to set the timeout parameter in the web.xml file
'
'com.businessobjects.sdk.ceutils.SessionCleanupListener
'
For the CMC, users need to set the timeout parameter in the web.xml file
Changing the default session timeout value for .NET CMC or InfoView
To change the default session timeout value for licenses for the CMC and InfoView, perform the following steps:
1. Search for the web.config file.
• To modify the default session timeout value in the CMC, search for web.config in the C:\Program Files\Business Objects\BusinessObjects Enterprise 11\Web Content folder.
• To modify the default session timeout value in InfoView, search for web.config in the C:\Program Files\Business Objects\BusinessObjects Enterprise 11\Web Content\Enterprise11\InfoView folder.
2. Open web.config in a text editor like Notepad and search for the following 'sessionState' section.
mode="InProc"
stateConnectionString="tcpip=127.0.0.1:42424"
sqlConnectionString="data source=127.0.0.1;user id=sa;password="
cookieless="false"
timeout="20"
/>
3. Change the 'timeout' attribute to set a new default session timeout value (in minutes).
Upon completing these steps, the default session timeout value in the CMC and InfoView is updated.
How to install the ActiveX viewer manually
How to install the ActiveX viewer manually in BusinessObjects Enterprise XI Release 2
Here are the steps:
1. Navigate to the ActivexViewer.cab located in the\Business Objects\common\3.5\crystalreportviewers115\ActiveXControls folder.
2. Extract the following .dll files:
CRViewer.dll
sviewhlp.dll
swebrs.dll
reportparameterdialog.dll
3.Copy the files to a folder on the client computer (for example, C:\Temp).
4. Register the .dll files from the command prompt using regsvr32 as follows:
regsvr32 C:\Temp\CRViewer.dll
regsvr32 C:\Temp\sviewhlp.dll
regsvr32 C:\Temp\swebrs.dll
regsvr32 C:\Temp\reportparameterdialog.dll
Here are the steps:
1. Navigate to the ActivexViewer.cab located in the
2. Extract the following .dll files:
CRViewer.dll
sviewhlp.dll
swebrs.dll
reportparameterdialog.dll
3.Copy the files to a folder on the client computer (for example, C:\Temp).
4. Register the .dll files from the command prompt using regsvr32 as follows:
regsvr32 C:\Temp\CRViewer.dll
regsvr32 C:\Temp\sviewhlp.dll
regsvr32 C:\Temp\swebrs.dll
regsvr32 C:\Temp\reportparameterdialog.dll
Desktop Intelligence Permission Problem
Platform:
Desktop Intelligence
BusinessObjects XI, XI Release 2
A
common problem is when you delete a report from the repository and then
realises that it was a mistake removing it. Even though you have a
local copy of the report you can't open it. This is because BOE is
validating the rights against the repository and when the report does
not exist there it can't be opened.
If you try to open that report in Desktop Intelligence you will get an error stating: You are not authorized to use this document. (FRM00008).
There
are a number of possible workarounds for this problem, one being that
you create a dummy report in the repository with the same name as the
report you just deleted. Then you find out the path and file name
through Central Management Console. Browse to the report folder in
Input File Repositry Server and delete the file (remember the file
name). Add the original report to the same place and change it's name
to the same as the deleted file. Now you are able to import it into
Desktop Intelligence.
This solution doesn't work in all
situations and it's not a supported method. Manually deleting files
from FRS is NOT a good idea in most cases. With this particual problem
there exist a different solution that will solve this.
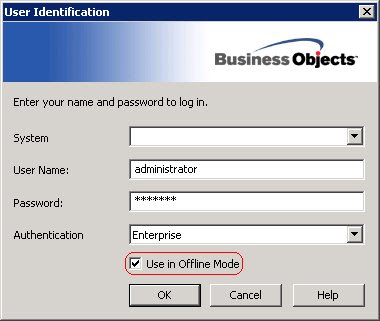
- Open Desktop Intelligence - check the Use in Offline Mode checkbox when logging in.
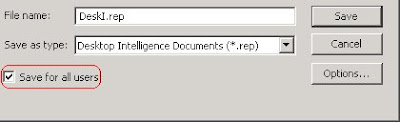
Open the report. - Save your report - check the Save for all users
- Close Desktop Intelligence.
- Open Desktop Intelligence - login to your repository, not in offline mode.
- It should now be possible to open the report and publish it to the repository.


And, yes, a backup is also one way out of this...
Web Intelligence Error--RWI 00134
If you receive the error "Could not get an output file for the document." with error code RWI 00134 there is a problem with Tomcat.

The
error source are unknown to me but if there are anyone knowing this it
would be interesting to learn. As this problem is isolated to Tomcat
the problem is only visible in the Java platform. The code RWI stands for ReportEngine Web Intelligence which means that the problem is only affecting Web Intelligence reports.
The solution is to restart Tomcat.
There
exist an error description from Business Objects but it doesn't give
much information other that it could be a memory related problem:
Cause
While serializing a document state, an error occurred. This might be due to insufficient memory or an I/O error.
Action
Ensure that there is sufficient memory available. Also, check for any we bi.properties customization.
BOXIr2 Version Numbers
BusinessObjects Enterprise XI Release 2 Version Numbers
MHF = Monthly Hot Fix.
CHF = Critical Hot Fix.
SP = Service Pack.
FP = Fix Pack.
RTM = Release To Market (first release, without any patches).
* 11.5.0.313 --> RTM
* 11.5.3.417 --> SP1
* 11.5.7.608 --> MHF1
* 11.5.7.682 --> CHF13
* 11.5.7.723 --> CHF14
* 11.5.7.770 --> CHF15
* 11.5.7.811 --> CHF16
* 11.5.7.852 --> CHF17
* 11.5.7.1048 --> CHF20
* 11.5.8.826 --> SP2
* 11.5.8.826 --> FP2.1
* 11.5.8.939 --> FP2.2
* 11.5.8.963 --> FP2.3
* 11.5.8.998 --> FP2.4
* 11.5.8.1030 --> FP2.5
* 11.5.8.1061 --> FP2.6
* 11.5.8.1111 --> FP2.7
* 11.5.9.1076 --> SP3
* 11.5.9.1101 --> FP3.1
* 11.5.9.1138 --> FP3.2
* 11.5.10.1263 --> SP4
Using explicitly denied rights to globally remove privileges for non-administrators
Deny overrides grant in Business Objects
The way that "explicitly denied" rights work (on the advanced rights
tab) enables us to globally remove rights for groups or individuals.
Important: "explicitly denied" rights will always override an "explicit grant"
For any given right, if a user is a member of any group where that specific right is denied, the net right is denied.
Deny always trumps grant.
Using explicit denies at the highest level
We can set folder rights in CMC at the highest level, the "Settings"
level. Doing this will effectively deny the right at all levels (since
the "settings" level is the parent folder of all folders). Setting
rights at this level avoids needing to individually remove rights at
the folder level for various groups.

Go to the "Rights" tab in the settings.

On the rights tab, add a group that you wish to explicitly deny rights.
In our case we created a "non-administrators"
group. We wanted to deny all non-administrators certain rights, like
scheduling reports. We added all non-admins to the non-administrators
group. Added an entry on the rights tab for the non-admin group and set
the advanced rights.
On the "Advanced Rights" each individual right
(row) can be set to either "Explicitly Granted," "Explicitly Denied,"
or "Not Specified."
By setting rights that are explicitly denied, it
effectively denies the right for any members of the specified group
(non-administrators in our case).
Here is a list of the rights that can be set in this way in BusinessObjects:
General Rights
- Add objects to the folder
- View objects
- Edit objects
- Modify the rights users have to objects
- Schedule the document to run
- Delete objects
- Define server groups to process jobs
- Delete instances
- Copy objects to another folder
- Schedule to destinations
- View document instances
- Pause and Resume document instances
- Securely modify rights users have to objects.
- Reschedule instances
- Schedule on behalf of other users
- Allow discussion threads
- View objects that the user owns
- Edit objects that the user owns
- Modify the rights users have to objects that the user owns
- Delete objects that the user owns
- Delete instances that the user owns
- View document instances that the user owns
- Pause and Resume document instances that the user owns
- Securely modify rights users have to objects that the user owns.
- Reschedule instances that the user owns
Desktop Intelligence Rights
- Refresh the report's data
- Refresh List of Values
- Use Lists of Values
- View SQL
- Export the report's data
- Download files associated with the object
Desktop Intelligence Add in
- Download files associated with the object
Report
- Print the report's data
- Refresh the report's data
- Export the report's data
- Download files associated with the report
Web Intelligence Document
- Refresh the report's data
- Edit Query
- Refresh List of Values
- Use Lists of Values
- View SQL
- Export the report's data
- Download files associated with the object
Configuring a Clustered Server on Business Objects XI-R2
What is Clustering?
Clustering is connecting two or more computers together in such a
way that they behave like a single computer. Clustering can be used for
parallel processing, load balancing and fault tolerance. That is as far
as the definition goes.
What exactly happens in real life? Let's consider an example. John
is the administrator in a company responsible for administering BO. On
a typical day,several reports are run on the CMS (Central Management
Server). One day, John finds that CMS is down for some reason. Yes, the
service will mail system engineers that it is down. But, there are many
reports that are waiting to be run. What can John do to better handle
the situation in the future?
Enter Clustering. John can set up a Clustered environment, where in
two or three CMS will run in parallel. So, one CMS will be active, and
the others will be passive. If the active one is down for some reason,
the other CMS will be up automatically. The end users would not even
know that one of the servers is down. It is that quick.
Why is Clustering important for Business Objects?
If for some reason the hardware crashes then BO environment will be on its knees.
•With Clustered environment, if one of the server goes down the other
comes up immediately and this is done automatically by BusinessObjects
without any external interference.
•With Clustered environment, we can have multiple Job Servers which can
run the jobs (reports) in parallel, distributing them between servers.
•We can load balance the server so that resources are distributed evenly between servers.
When is using Clustering recommended?
If there is an Environment with thousands of Jobs running everyday and would need high availability of BO.
What is the procedure to setup a Clustered environment?
Make sure you have all the requirements to build a server like
Oracle Client, Java. For SSO, IIS need to be installed on the server.
It is better if IIS is installed before installing BO, as BO will
install the Web Component Adaptors for IIS and Java during install.


Install: First Sever
a) Insert the BO XI CD.

b) Select “Perform Server Installation”, click “Next”.
c) Enter Product Registration Code, click “Next”.
d) Select the location for BusinessObjects, click “Next”.
e) Setting up the Repository, click “Next”.

f) Setting up the BusinessObjects Repository, click “Next”. Make a note
of the credentials as they are needed in second server with same
credentials and they are also case sensitive.

g) Select the Web Component Adapter, click “Next”.

h) Click “Next”.

i) Installation will begin once “Next” is clicked. If any changes have
to be made it can be made at this time by clicking “Back”.

j) Follow the instructions.

k) Leave the Administrator credentials empty, Click “Finish”.
Install: Second Server (Clustering)
a) Insert the BO XI CD.

b) Select “Perform Server Installation”, click “Next”.
c) Enter Product Registration Code, click “Next”.
d) Select the location for BusinessObjects, click “Next”.
e) Setting up the Clustered Environment, select “Expand”

•Type in the existing CMS Name ex: ASVMB0S302 (First server)
•Check the services which you want to be clustered
Note: It is better to uncheck “File Repository Servers” as each BO
XI Environment would have one location to get the reports and post the
reports. Once you uncheck “File Repository Servers”, “Enable servers
upon install” will be highlighted. Check this box so that the servers
are enabled after the install.

f) This is the important part about setting the repository, make
sure the credentials are same as the first server (case sensitive)

g) Follow the instructions.

Setting up Single Sign-On (SSO):
This needs to be done on all the servers which are in the cluster.
I - Modifying IIS Settings on the Server
a) Go to IIS Manager on the server

b) Right Click on “businessobjects” by expanding “Web Sites”->”Default Web Site”
c) Click on Properties

d) Click on Directory Security tab
e) Click “Edit” in Authentication and access control
i. Uncheck “Enable Anonymous Access”
ii. Check “Integrated Windows authentication”

f) Click OK and Apply
g) Repeat the steps for “crystalreportviewers115” and “Styles” under “Default Web Site”
II. Modifying web.config file
•Open the web.config (C:\Program Files\BusinessObjects Enterprise
11.5\Web Content) add the below line under <authentication
mode="Windows" />. This is to enable the use of SSO in CMC.
<identity impersonate="true" />
If authentication mode is set to “None” change it to “Windows”.
•Save and close the file
Note: This file is different from the one in BusinessObjects Enterprise 11.5\ \InfoView
•Open the web.config using Notepad (C:\Program Files\BusinessObjects
Enterprise 11.5\Web Content\Enterprise115\InfoView). This is to enable
the use of SSO in InfoView.
a. In the <configuration> section, find the line which reads,
<add key="cmsdefault" value="" />. Fill the “” with default CMS
machine name.
Note: For the second server (clustered) make sure have the same Default CMC machine name.
<add key="cmsDefault" value="ASVMBOS301" />
b. Find
<add key="authenticationDefault" value="secEnterprise" />
and replace with
<add key="authenticationDefault" value="secWinAD" />
c. Find
<add key="ssoEnabled" value="false" />
and replace with
<add key="ssoEnabled" value="true" />
d. In the <system.web> section under <!– AUTHENTICATION, find the line which reads
<authentication mode="None" />
replace with
<authentication mode="Windows" />
<identity imperonate="true" />
•Save and close the file
•Restart IIS by restarting World Wide Web Publishing Service in CCM (Central Configuration Manager)

Note: Login to CMC -> Manage->Authentication, if the tabs
are grayed out go to License Keys and check if the License keys are
present. If they are Restart the Server.
•Login to CMC and go to Manage->Authentication, click on Windows AD tab.
•Check “Windows Active Directory Authentication is enabled”

•Click in the box under “Windows AD Configuration Summary” where it says “”


•Click “Update”
•This is how it looks after the credentials are accepted.

Mapping the AD groups
•Click “Add”

•Check the first option under “New Alias Options”. This option will
assign the AD account to an Enterprise account, if Enterprise account
is already available.
•Check the second option under “Update Options”. This option will not
create an account in BO until the first time access BO XI using Windows
AD,.

•Click Update
•The mapped AD group will be converted something like

Note: The group is added in BO XI under Groups but there will be no
Users in that group. The Users will shows up as they login to BO
Enterprise using Windows AD credentials.
Note: The AD credentials should have administration privileges.
•Right click on Central Management Server and click on Properties,
under the configuration tab the CMC Data Source should point to the
same cluster on both servers.

•For all of the other servers on the second server CMS name should be pointed to the first server.

This completes the process of clustering multiple servers with SSO.
Subscribe to:
Posts (Atom)